
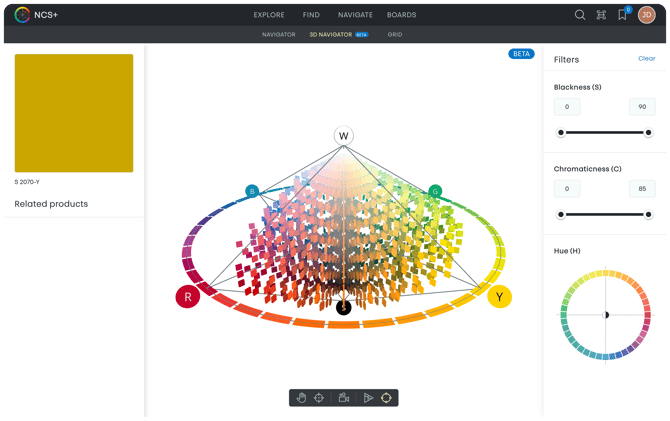
The 3D Navigator is an interactive way to explore the Natural Colour System in three dimensions. It visualises how hue, blackness and chromaticness relate to each other in a single, continuous colour space.
This article explains how to use the toolbar controls and the filters panel to get the most out of the 3D Navigator.
Getting started
You can rotate, zoom and pan freely within the colour space using your mouse or trackpad to find the colour area that you are looking for.
Toolbar controls
The toolbar at the bottom of the Navigator gives you additional controls to help you focus, inspect and understand specific parts of the system.

Pan
The Pan tool lets you move sideways or vertically within the colour space without rotating the view. You can also pan by holding down spacebar on your keyboard while dragging.
Target (focus on selected colour)
The Target control zooms the view directly to the currently selected colour and centres it in the Navigator. Use this when you want to inspect where a specific colour sits in the system or to quickly regain focus after moving around the colour space.
Cinematic mode
Cinematic mode rotates the view smoothly around the point you are currently looking at. Use this for example when you want to understand the three-dimensional structure of the entire system or a specific colour range.
Show triangles
Turning on Triangles displays the colour triangle for the currently selected hue as well as guiding lines for the blackness and chromaticness levels of the currently selected colour. Use this when you want clearer visual reference points within the space.
Show hues
Turning on Hues will render all hue families of the colour circle, not just the elementary hues Y, R, B, G.
Full-screen mode
Enabling full-screen mode will put the Navigator in a full-screen view for more convenient presentation purposes. It can be combined with the cinematic mode and other actions to create the presentation you are after.
You can exit full-screen mode by clicking again on the full-screen icon or clicking Escape on your keyboard.
Using the Filters panel
The Filters panel allows you to limit which colours are visible in the 3D Navigator based on NCS characteristics. With the right and left arrow above the nuance triangle, you can step between the following filters:
-
Blackness
-
Chromaticness
-
Whiteness
This can also be combined with the Hue at the bottom to create unique slices in the 3D space. The Hue filter allows you to select one or more hues to display in the 3D space.
Filters help reduce visual complexity and make it easier to work with specific ranges.
Why use filters?
Filters are useful when:
-
You want to focus on a narrow colour range
-
You are exploring alternatives within defined constraints
-
You want to avoid visually noisy areas of the colour space
For example, you might limit blackness and chromaticness to explore lighter, more muted colours within a specific hue family.
Combining filters and the toolbar
The 3D Navigator works best when filters and navigation are used together.

-
Apply filters to narrow the colour space
-
Use Target to focus on a reference colour
-
Rotate or use Cinematic mode to understand relationships
-
Pan locally to explore nearby alternatives